
Thursday, 2 May 2013
Underwater creature
Friday, 1 March 2013
3D practices.
NightCrawler!

For this topology task we had to model the Nightcrawler you see above.
For this i decided to try and do it without using image plane as reference. Using box modelling and the edge loop tool i shaped the overall body and extruded out arms and legs for desired result.

At this stage i was very happy with what i had, the topology on the legs are arms i thought worked well and wasn't too cluttered like past pieces of work.

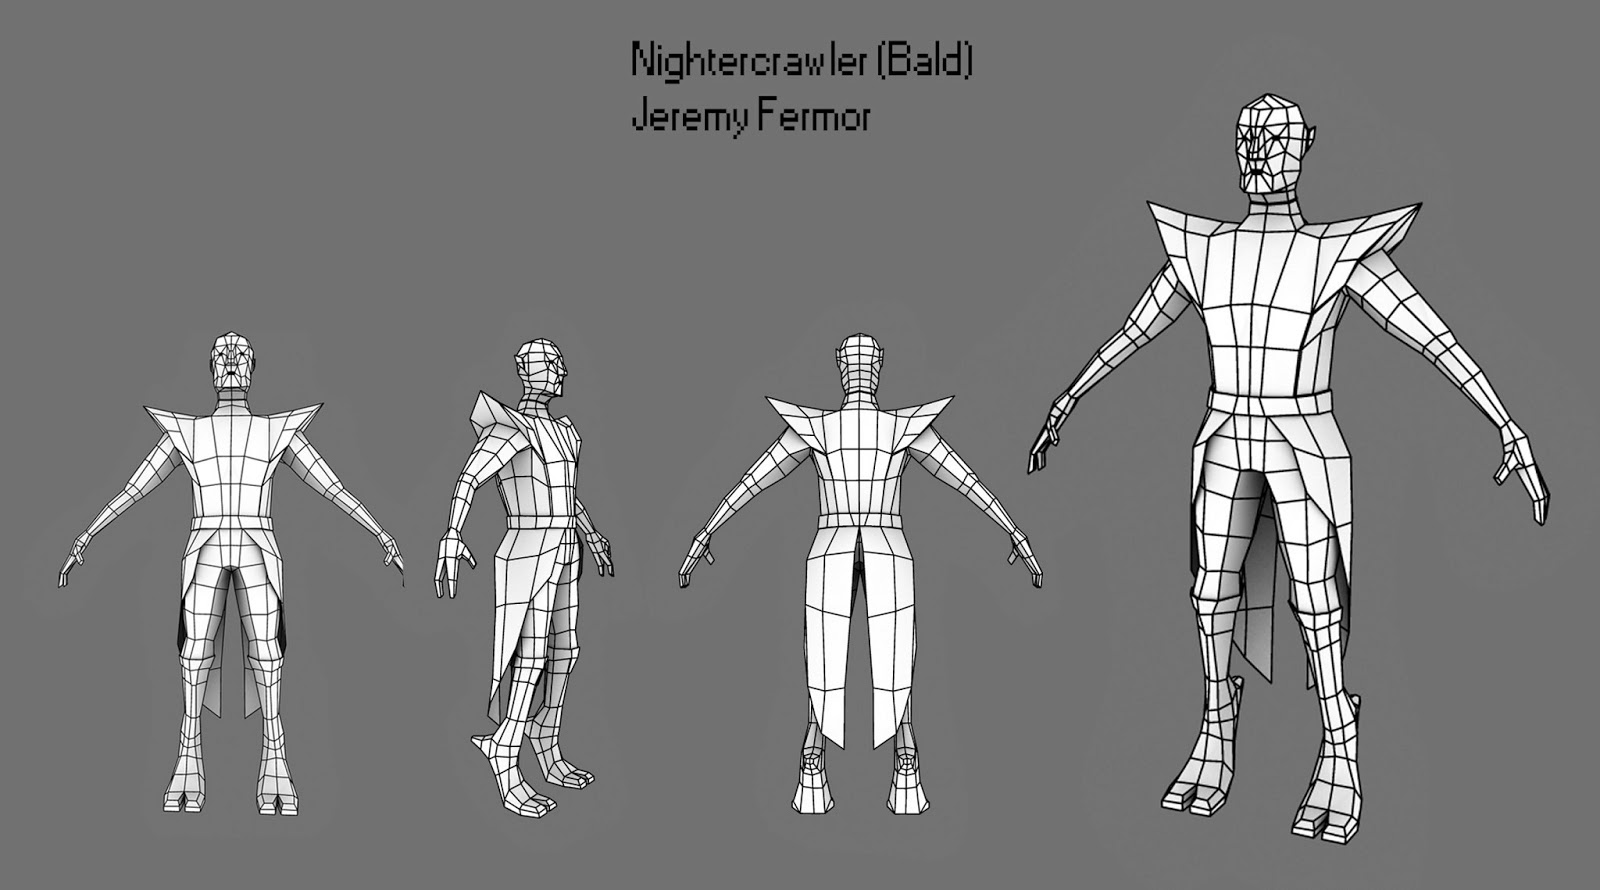
I really enjoyed doing this piece (As nightcrawler is a badass) I was pretty happy with the overall topology and i think i managed to keep it all quads. I feel much more confident in modelling lately and after doing this, obviously i ruined the whole thing with the terrible head but of course that is something else that i must learn and practice in time. ALSO forgot to do the tail, would love to go back to this and maybe even texture him at some point.
Minotaur.

Early stage of the Minotaur model, was going well at this stage, not too much polys and got the correct shape.

Front view

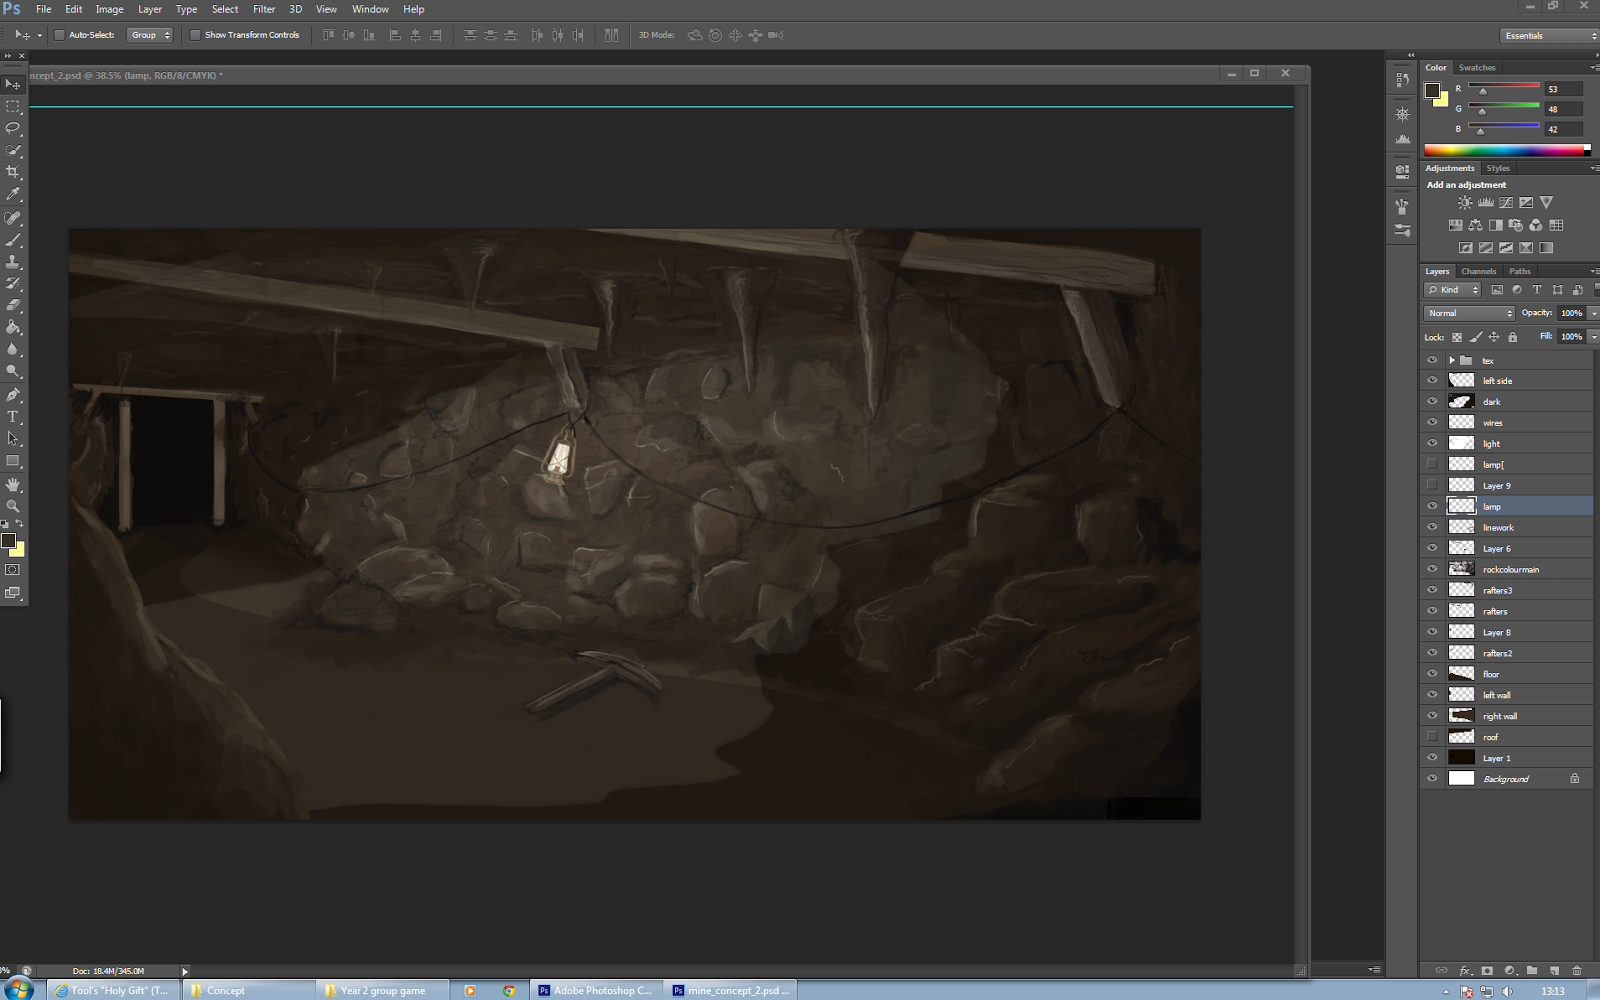
Concept art for current Game Project - The Mine
Currently we have selected group members to make our first group game project, the game is based in a mine and consists of randomly generated mine shafts. Here are a few peices i have drawn to show some of the ideas for my own personal benifit or ideas to get a clear understanding before we make the models.

.jpg)
Think i am pretty much done with this peice, want it finished so i can move onto the next part. Quite happy with final outcome and gives a nice idea on what the mine might possibly look like.


Enemy
Thursday, 7 February 2013
Modelling Characters!

as this little project we have been told to polish up on our body modeling skills, so what a great way to practice then to modeling our very own 3d avatar. Digijez, go!

Using image planes of myself as reference i started box modelling myself
(didn't have any screens prior to this)

Happy with it so far, more is needed to give it a more smoother look and head needs to be added.
topology and anatomy is going 'okay' just need to build more apon.

Side view

Worked on this more and has added more loops and smoothed off the whole thing a little more. I learned a lot from this task, one of the problems i had was not have a good optimized shape to begin with, this really help when added edge loop because you can limit yourself and only add when needed. In the future i will remember to keep optimized as early as possible to save time and hassle later on.

My start on a face
Test model - Modelling test

For this we got told to replicate the picture on the right in class quickly. Quick 10 minute model and i believe that it came out pretty similar to the desired result.
Wednesday, 30 January 2013
Sci-Fi Turret 3D paintover


Here are some designs of what i might do, i didn't really like the smaller army typical looking designs so i elaborated more of one of the cannon type turrets.
This was the first stand for the turret i designed, quite liked it but didn't really have much to work with, couldn't think of what sort of design would fit with it.
Starting in Maya i began on the base first to work out how the gun would stand, simply extruding and playing around with a cube to get a nice looking support.


Began with the turret as a basic blocked out shape
just so i could get the overall idea of the shape i wanted.

at this stage quite a lot of improvements and detail started to take place.


Lighting and camera set-up


Here is the final result. I am quite pleased with the model before the paintover but maybe more detail and shape could of be added. For the paintover i should've spent more time deciding a better colour scheme to give the turret more character. Background of course would not be final outcome and felt like i completely killed it. Other then that this was an enjoyable task what i will try to attempt again in the future using the same techniques..
Wednesday, 23 January 2013
Alien landscape


I started drawing many designs, i liked the idea of a viney and dangerous plant that many attracts others with fruit or berries. I was also looking in to some sort of egg design that was rooted into the ground, this would be how it would feed and would this was a interesting concept.


I then decided to do some silhouettes taking human scale into account and how they would weight up to a standard male height.

This was the main idea i liked so i added some detail and some other colour effects.

I started to model and design this plant in Mudbox.

before i knew it this started to prove difficult and my computer simply could not handle it.

Program crashed, in the future i shall make a basic mesh first to save myself more time later on because of this the program crashed.

Unfortunately it appears that i had quite a few problems with mudbox, i believe it might be because i got to the point where i had to constantly subdivide to get any sort of detail, after a while my pc died. In the future i should try making a basic mesh in maya first and see if mudbox handles that any better.
Wednesday, 16 January 2013
Weekly Photoshop assignment - Wrinkles...

Wrinkles moodboard, i liked the idea of some wise old man. Maybe a buddish. Or a big beard, beards are good.


I started by blocking out the basic head, getting the shadows and form in before i started. This time i actually tried going on straight with colour.

added few shadows and details, got my colour palette set up as-well so i can could get nice contrasting colour and a good colour scheme

Even more detail and lighting, really started working on the wrinkles here and getting some of the bounced lighting off them.

New eyes and more colour

Preying hands. Praise the lord.

huuuuuu


Didn't know what one looked best but i liked the final outcome either way. Maybe could of worked on the shadows and lighting a bit more and his left shoulder does look a little out of place. Would like to work on a background at some point in the future, whatever would fit. Either way i think the composition is fairly decent and i am please with the outcome. Shall defiantly use the skills and techniques i learned here and apply to my work in the future.
Subscribe to:
Comments (Atom)